Solar System Size Scale
2018-02-06
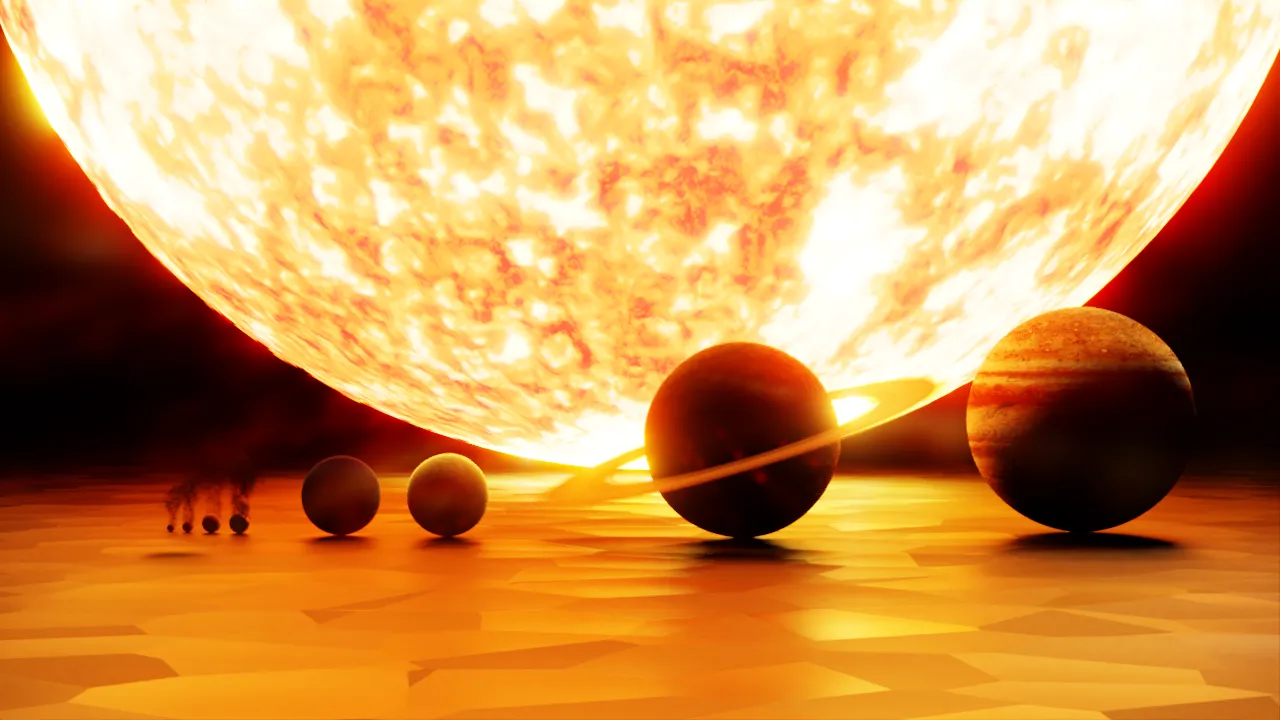
To learn about Blender's compositing I decided to go all dramatic in an very astronomical way.
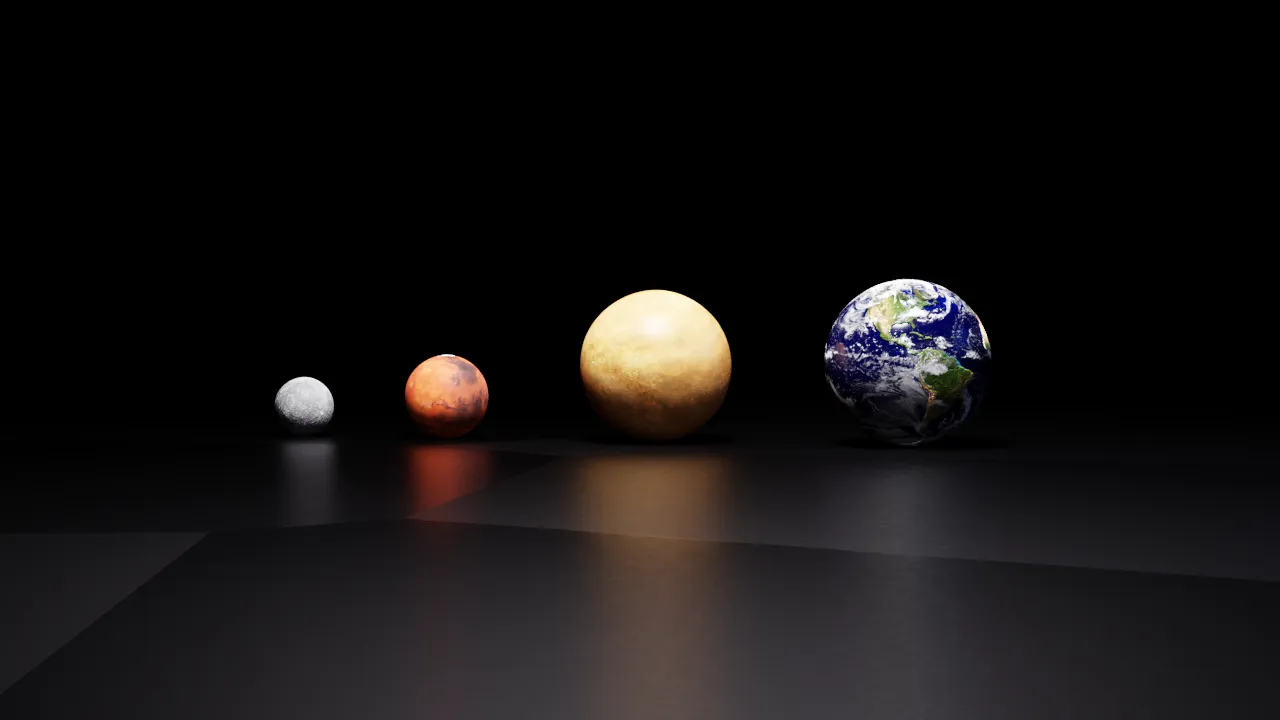
This was a scene in which I learnt a lot, not just about compositing. Lots of fiddling with materials, mapping and textures to get the rocky planets working.
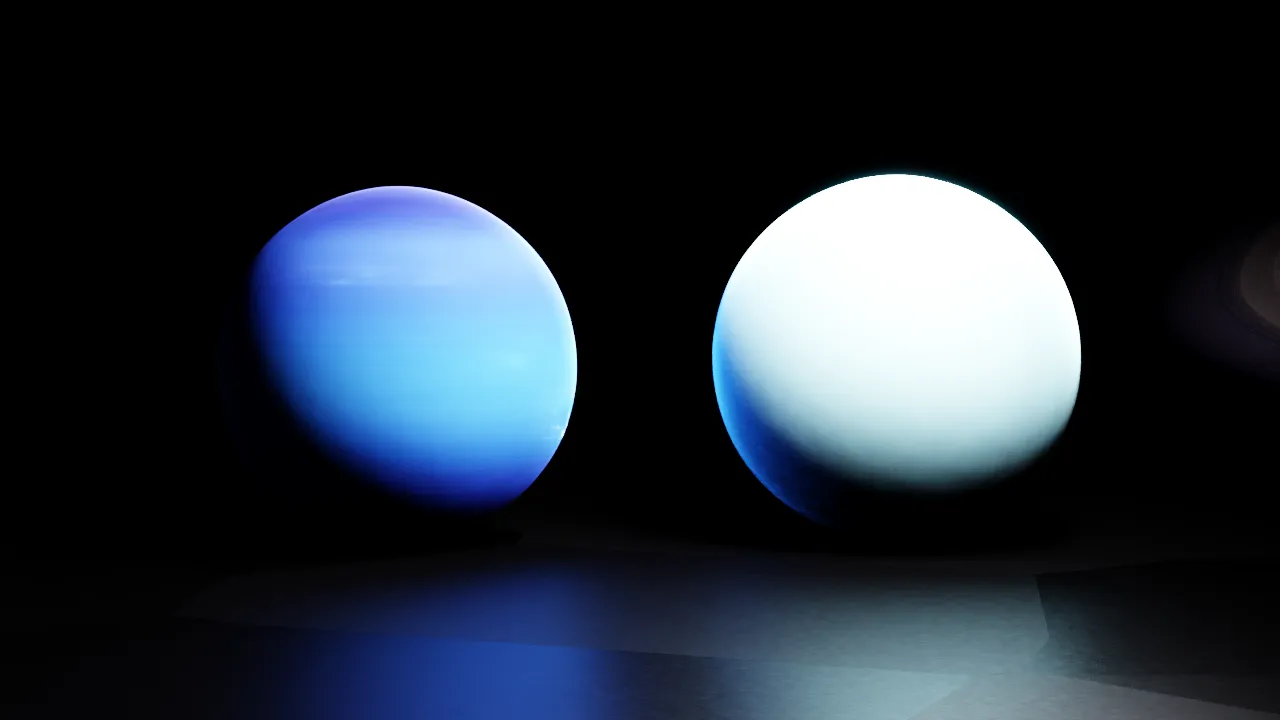
And then even more fiddling for the Gas Giants, to try and get that characteristic atmospheric effect along the boundary of the planet surface.
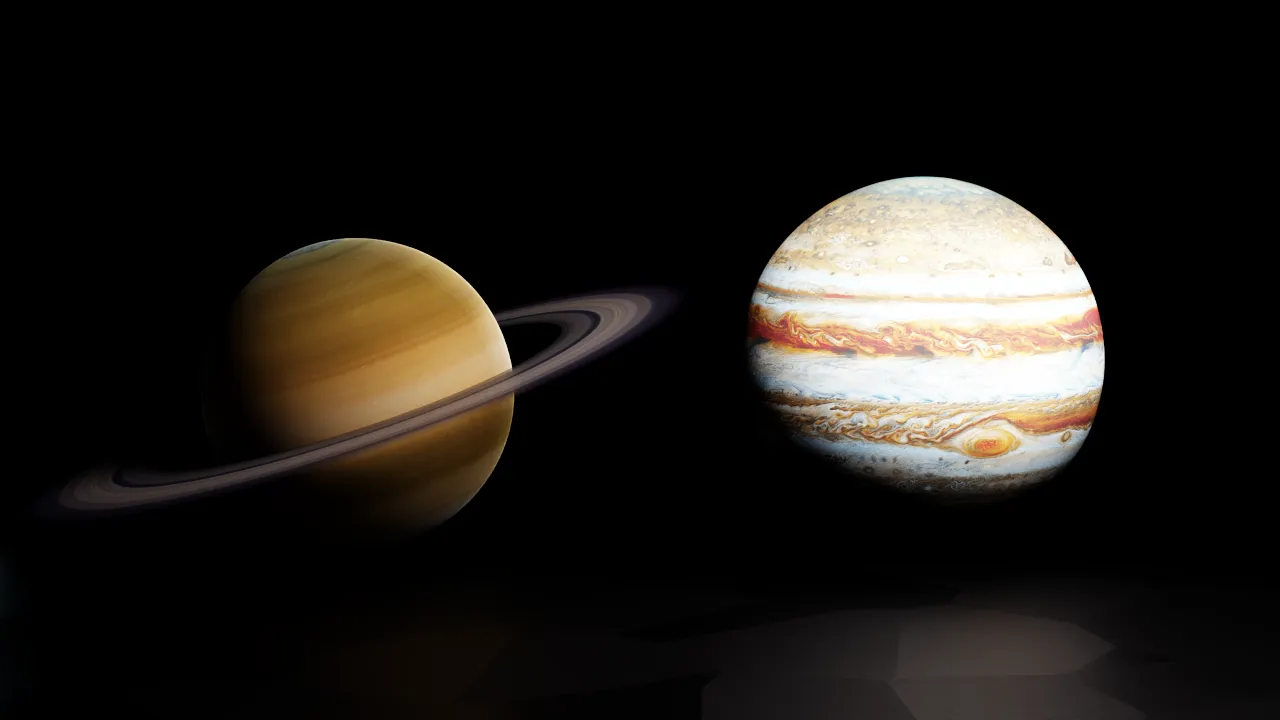
Setting up Saturn’s ring was a pain with the UV mapping, but eventually got it working!
And then figuring out how to do heat displacement (render a second layer where the Sun is textured with coloured noise, where I select only the red and animate the hue to give the impression of evolving noise), plus plenty of ghosts, glare and blurring to give the impression of brightness.
All those fancy effects come at a cost in computation on the compositing. And here it is, the spaghetti mess that is my compositing node layout for this scene. At the very top we have glare and colour correction, which is linked to an add node and an animated value, which was used to achieve the fake ISO effect when the Sun turns on and everything goes white. Below that are a collection of glares, ghosts and blurs used to make the sun seem hot hot hot! The collection of ID Masks in the bottom left is used to generate the displacement map. Various masks and blurs go in here to make sure there is no displacement at the image edges nor around Saturn or Jupiter. They all combine right before a colour correction on the right hand side of the tree, and the output you get is shown in the video at the bottom! Yeah, I know about node groups, but I wanted to lay it all out in one go.